Component Tester Mod
This component tester has been around for a while, and despite its simplicity, I have found its place on my bench to be invaluable. This is a cheap module that has more ups than downs. You may find more information about this tester here.
The goal of this project is to:
1) Create an enclosure
2) Replace the 9V battery power source
3) Install a USB-C charger
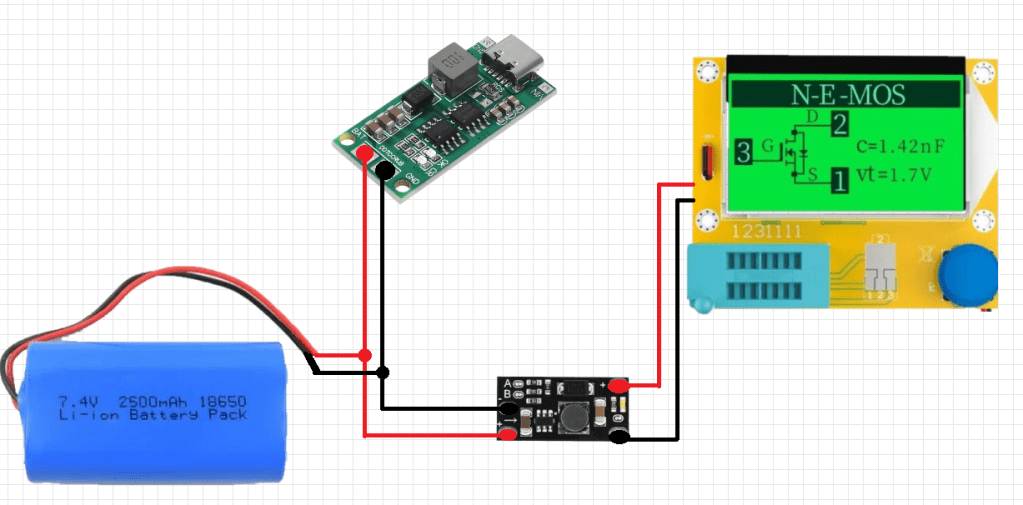
The electronics in this mod utilize modules readily available on the market. All you really need to do is solder or crimp everything together!
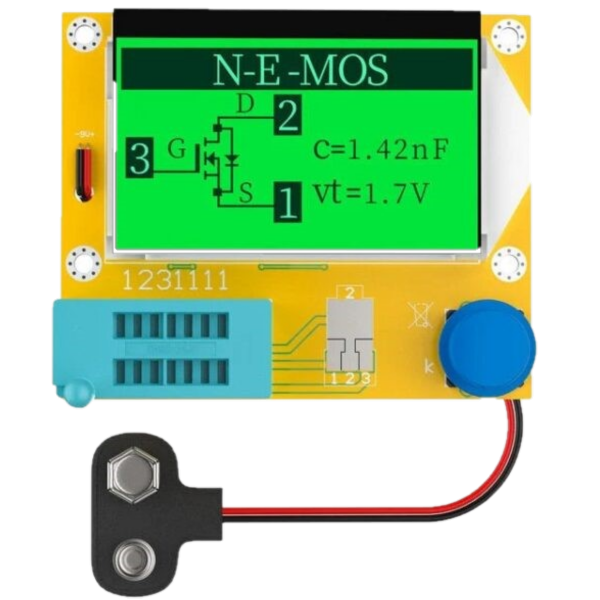
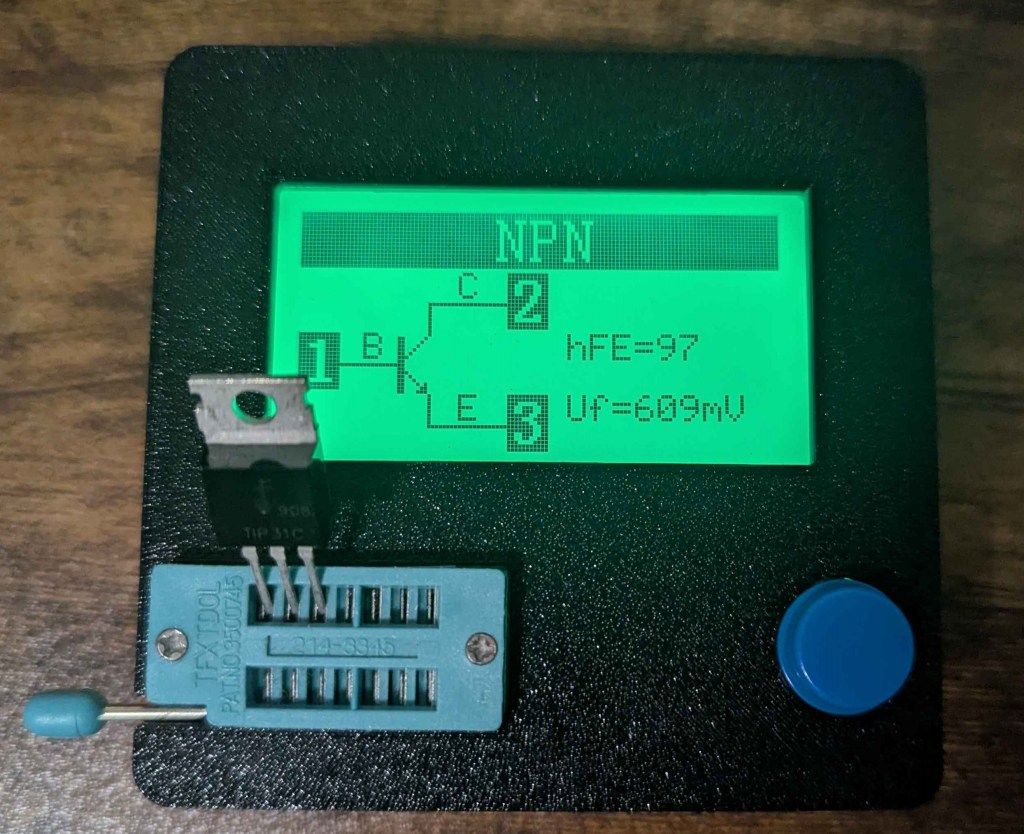
Component Tester Module
This cleverly thought up module is an open source creation by Markus Frejek and was further refined by Karl-Heinz Kübbeler.
While they are not involved in this module’s mass production and sales, their decision to allow anyone and everyone to access this project resulted in a quality of life upgrade for any tinkerer out there.
You may learn more about it here
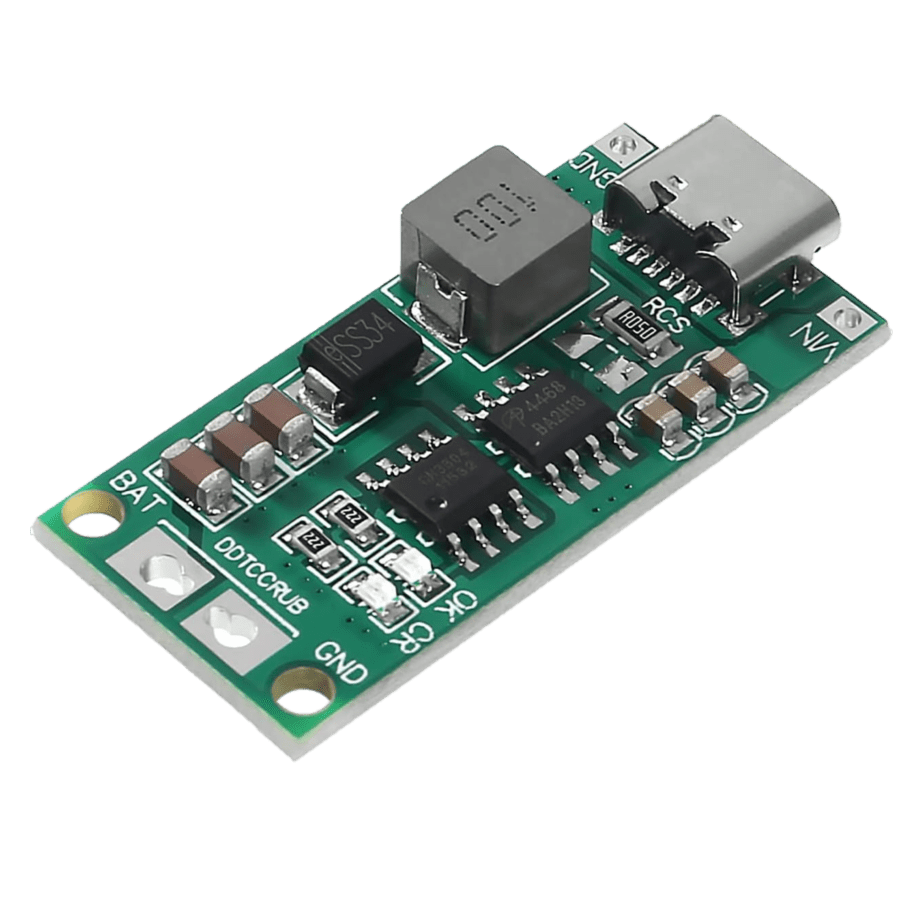
USB-C Charging Module
This module allows us to charge the battery pack safely and prevents overcharging of the cells once a certain threshold has been reached. The downside of this module is that it does not consistently work with all USB-C chargers, specifically PD chargers.
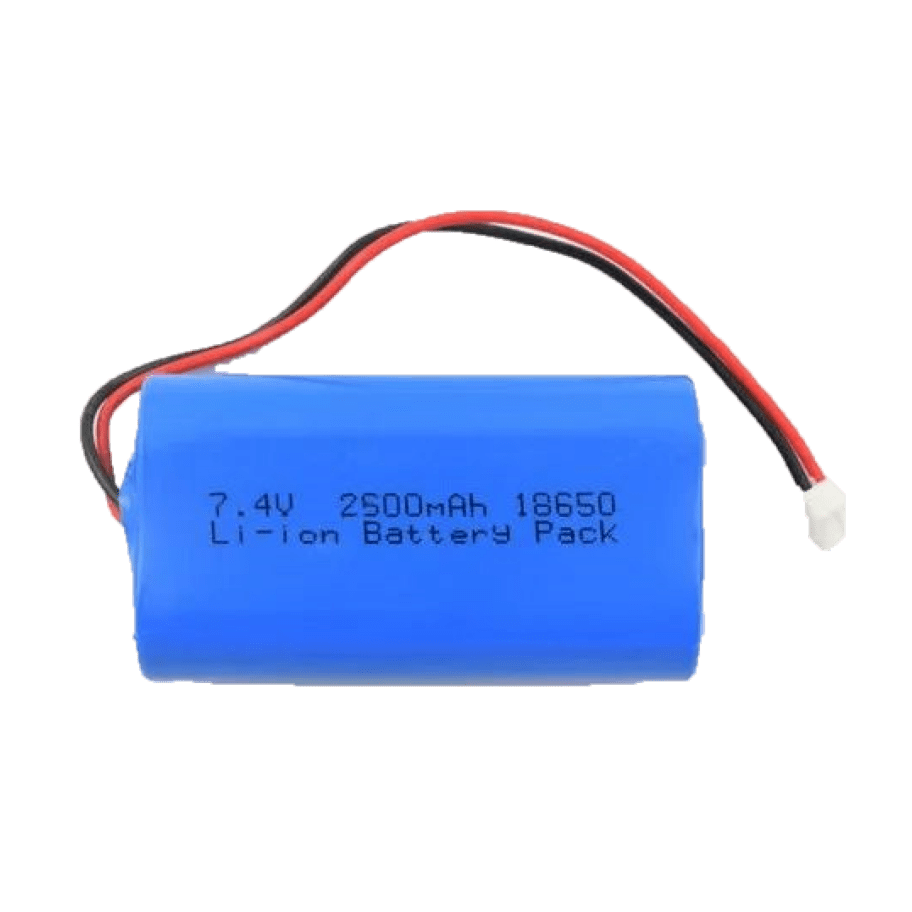
2S1P 18650 Battery Pack
The battery pack contains a rudimentary protection circuit that is shrink-wrapped within the unit. If you decide to create your own 2S1P battery pack, a protection circuit module can be purchased cheaply.
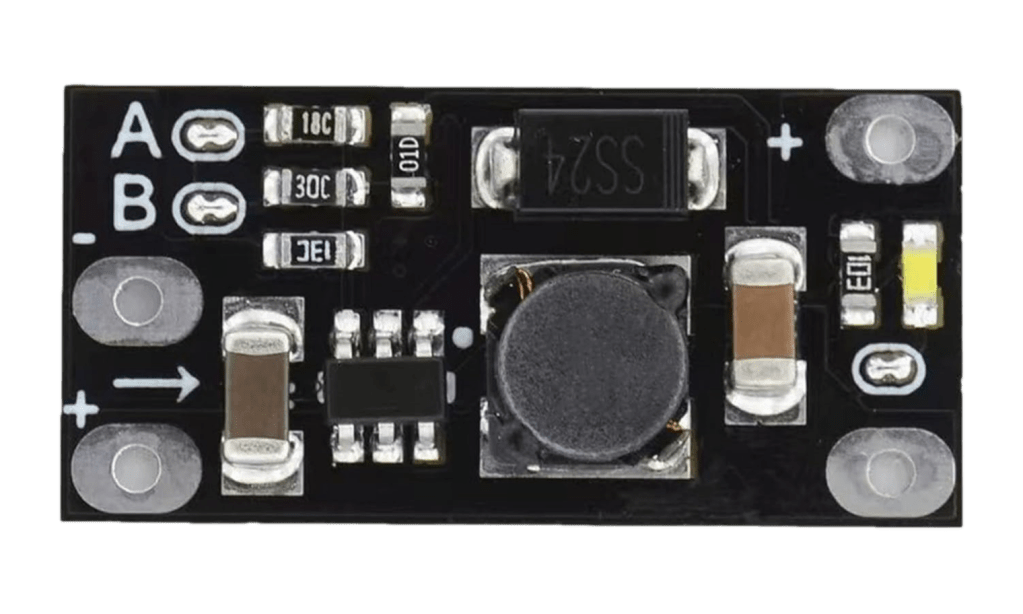
Voltage Boost Converter
A boost converter to elevate the battery’s 7.4V output into a consistent 9V output.
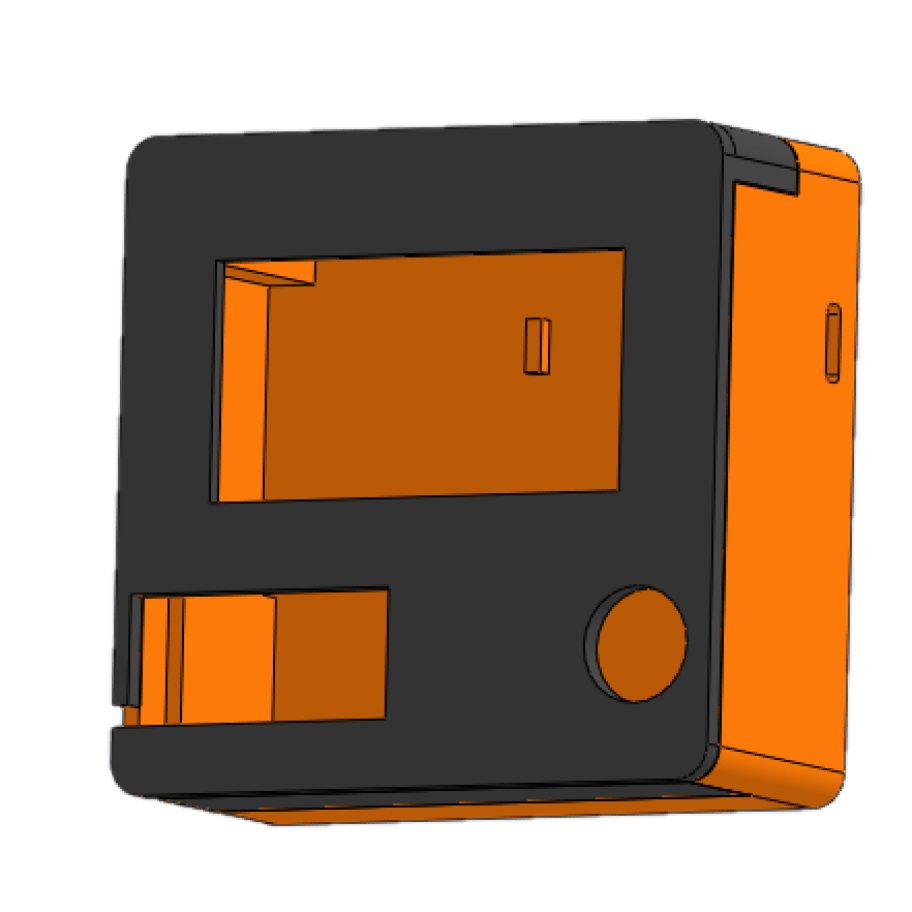
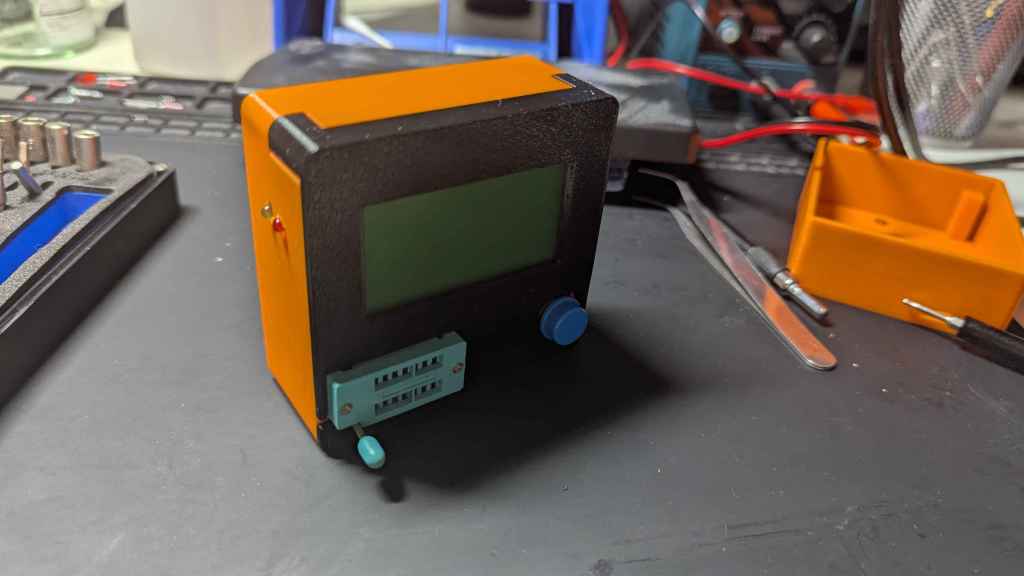
PETG Enclosure
I fired up SolidWorks to create a two-piece casing that could hold everything neatly together. This was then printed on my MK3S+ Prusa in a little under four hours. Its simple and relatively straightforward design was less of a challenge than deciding which colors paired well.
You may download what I made here
Wiring Diagram
Mistakes Made:
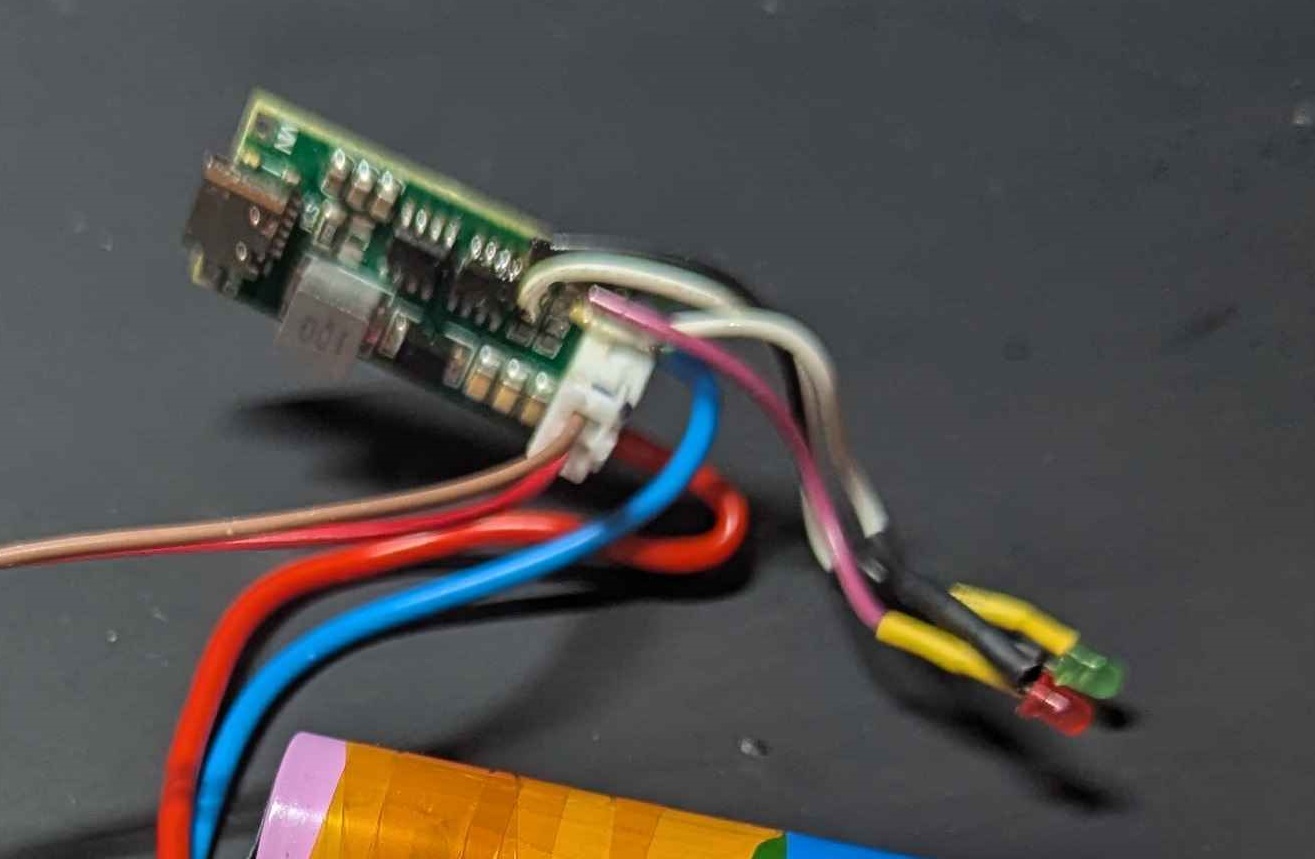
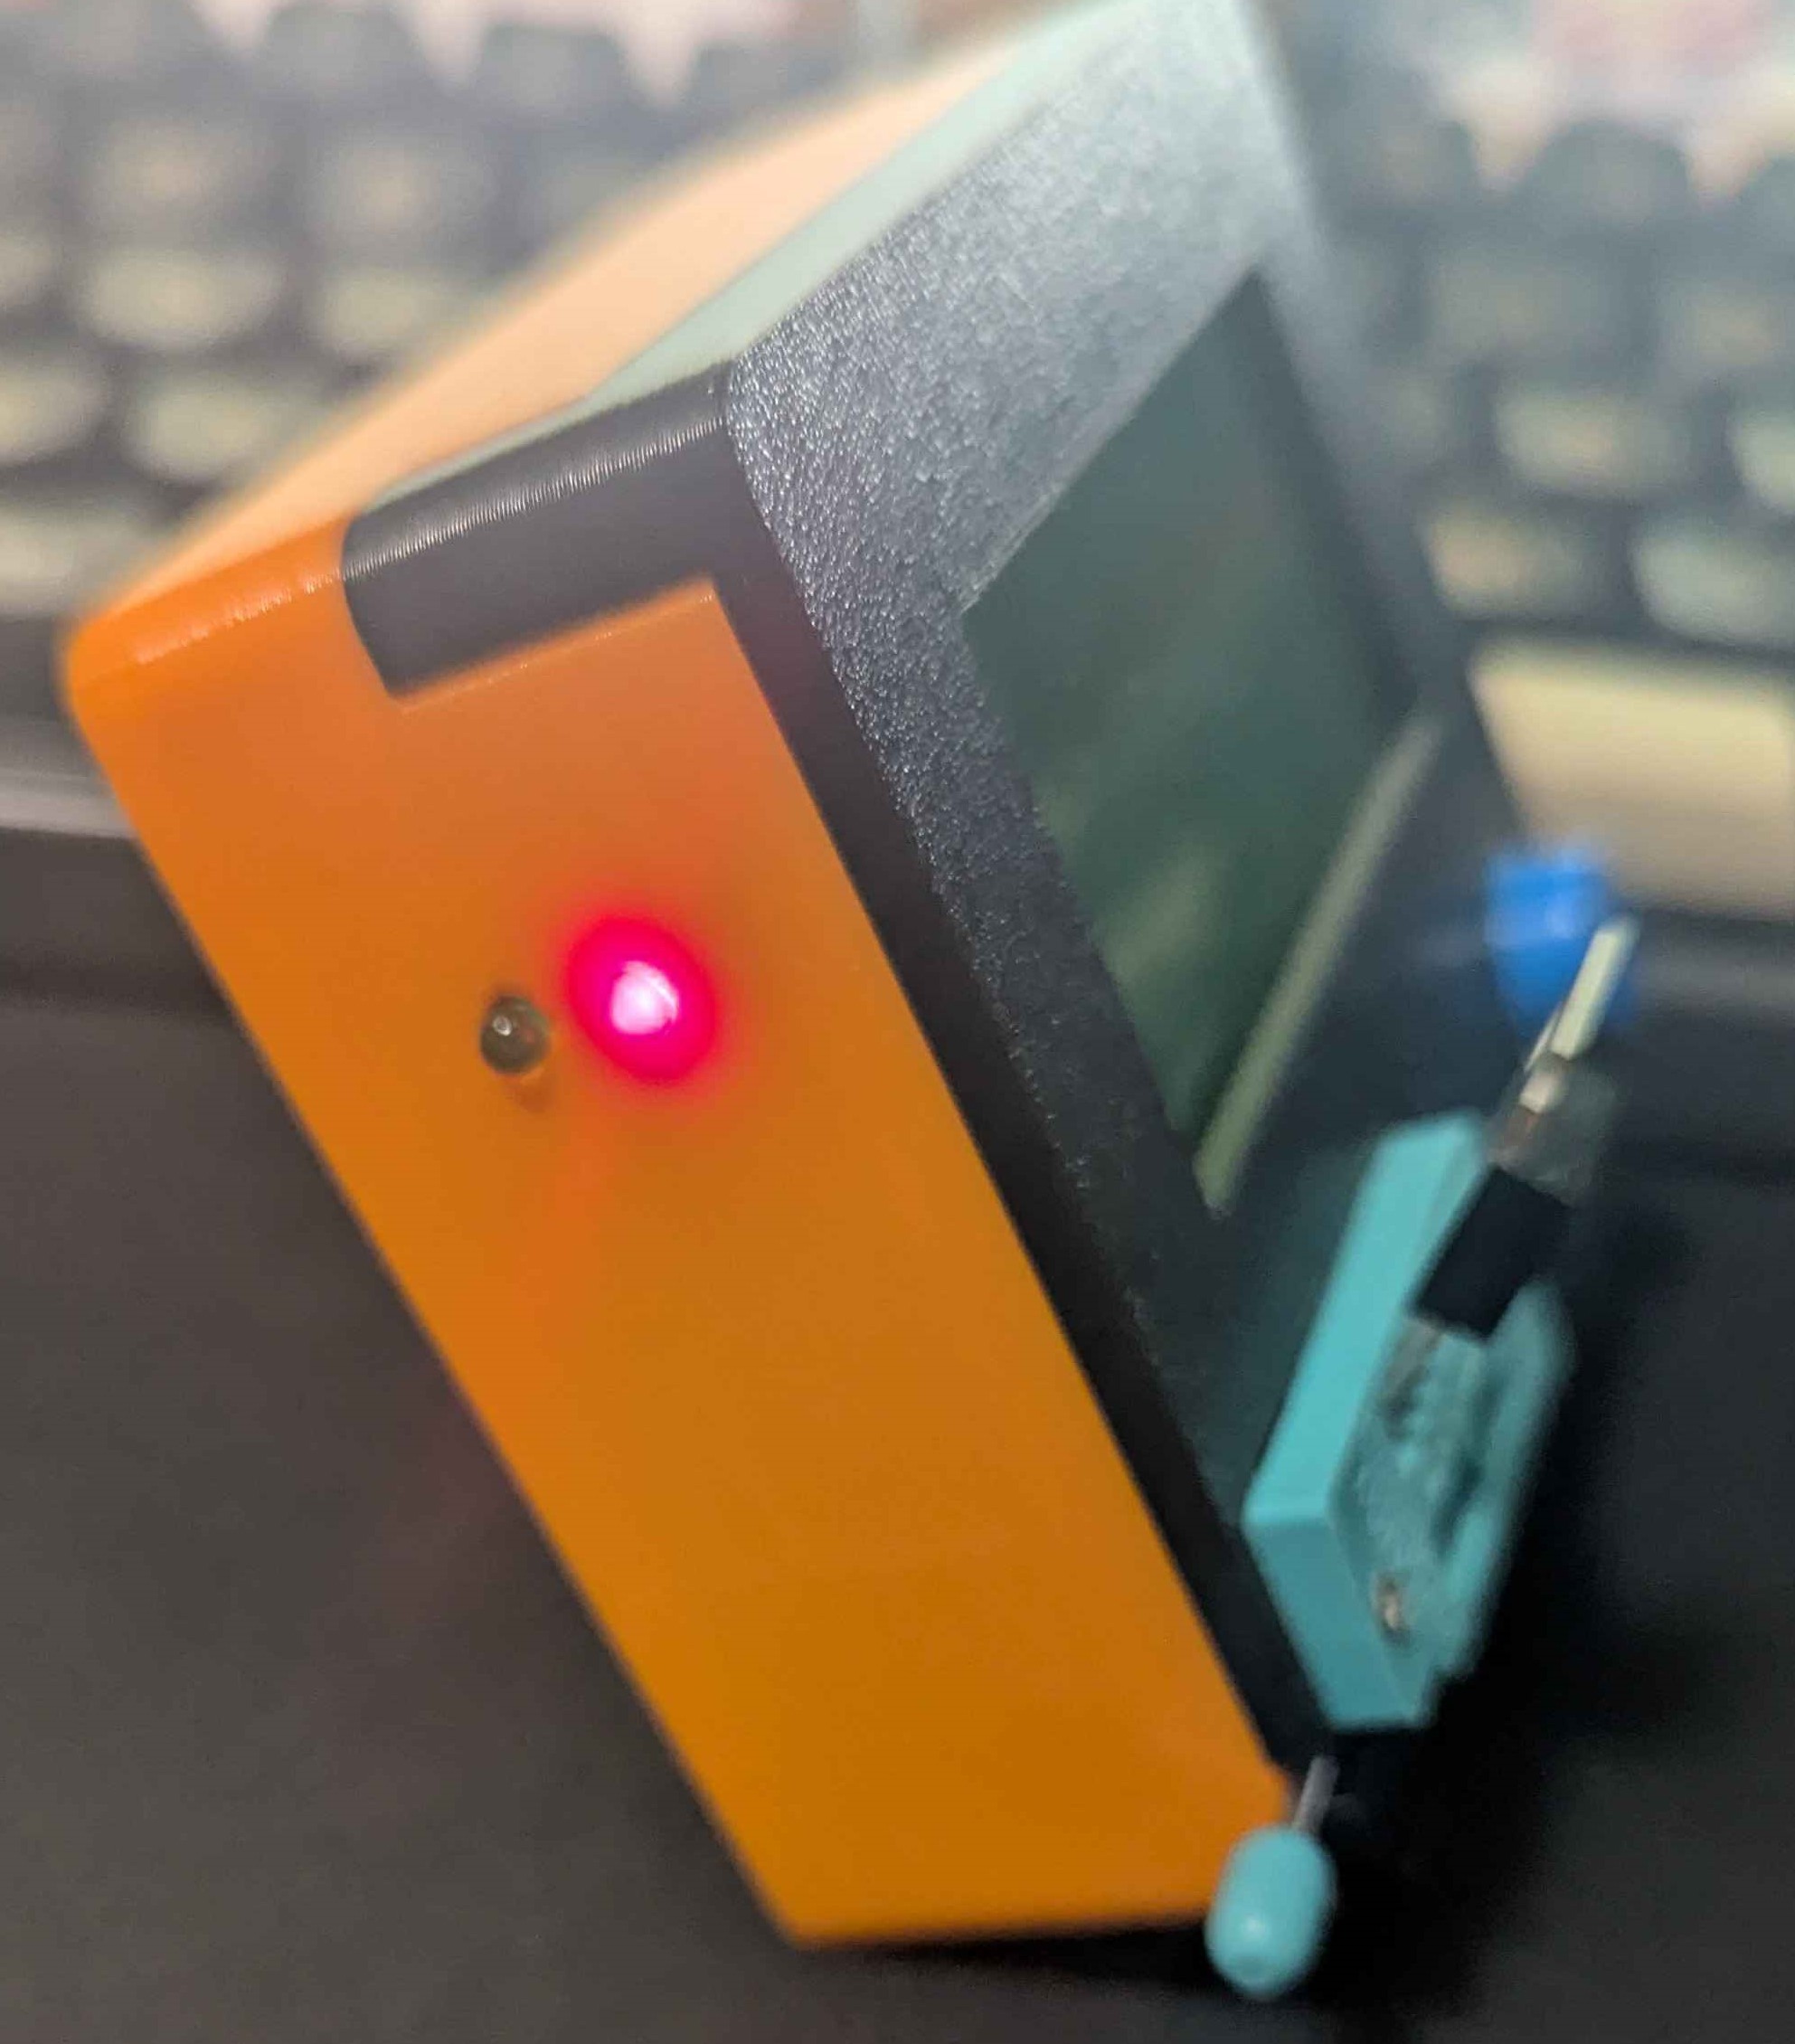
After assembly, I realized that I had forgotten a crucial aspect of the charging module: the status light.
So I desoldered the LEDs from the module and installed standard through-hole LEDs that would be visible from the outside.
I then drilled two holes on the side of the enclosure on the lowest speed to ensure that the friction of the drill would not heat or tear through the print.
And we’re done! A small and simple project that greatly improves the quality of life for any maker out there.


Leave a comment